Windows 8 Build 8888.16384.win8_gdr_soc_nv.120724-2107
| Windows 8 的版本 | |
 | |
| 操作系统系列 | Windows NT 系列 |
|---|---|
| 内核版本 | 6.2 |
| 内部版本号 | 8888 |
| 修订版本号 | 16384 |
| 体系结构 | ARM32 |
| 内部版本实验室 | win8_gdr_soc_nv |
| 编译日期 | 2012 年 07 月 24 日 |
| 有效期 | |
| 时间炸弹 | 2013 年 1 月 15 日 (+175 天) |
| 已知 SKU 版本 | |
| RT (CoreARM) | |
| 关于对话框 | |
 | |
Windows 8 build 8888 (win8_gdr_soc_nv) is an RTM candidate build of Windows 8, which was uploaded on BetaArchive on an unknown date in the ARM32 architecture.
The build number of this build and several others, 8888 was rejected in favor of 9200 due to the build number not being divisible by 16.
安装
QEMU 安装指南:
文件准备
以下是我们需要准备的文件:
- 专门为Windows RT进行修改的QEMU v10.1.0
- 专门为Windows RT进行修改的edk2固件
- 一个虚拟磁盘镜像(用于存储操作系统以便进行模拟)
- 一个Windows RT镜像用于安装系统(要求版本必须高于或者等于6.2.8318.0.fbl_core1_soc.120409-2355)
- 高版本Windows的ESP分区文件(除BCD外)(以15063的文件的文件为例)
注意事项

- 由于在Windows RT Build 8439到Build 9354之间对hal.dll的修改导致改阶段之间的系统完全无法使用原有
hal.dll进行启动,需要替换为Windows RT Build 8437中的版本。
- QEMU的usb输入仿真在某些情况下可能会出现失效的情况.。解决这个情况需要切换到QEMU compatibility monitor (Ctrl+Alt+2) 并输入运行以下指令:
device_del kbd
device_add usb-kbd,id=kbd
- 注意:以下是从工程机泄露的系统需要手动对所有OEM驱动进行删除,否则将会因为驱动不兼容导致系统启动失败:
6.2.8318.0.fbl_core1_soc.120409-2355
6.2.8375.0.winmain_win8rc.120504-1900
6.2.8419.0.winmain.120521-1835
6.2.8437.0.winmain.120618-1325
6.2.8437.1.fbl_dev_dp8.120621-2300
6.2.8520.0.fbl_eeap.120722-1632 - zh-cn以及en-us版本
6.3.9354.0.winmain.130301-1710
6.3.9468.0.winblue_rtm.130725-1203
6.3.9471.0.fbl_partner_out30.130726-2004
6.3.9477.0.fbl_partner_out31.130803-0736
6.3.9477.0.fbl_partner_out21.130803-1037
6.3.9478.0.winblue_rtm.130804-1505
6.3.9600.16596.winblues14_gdr_lean.140112-2038
- 由于未知原因无法通过原有系统的
bootarm.efi进行引导,我们需要换为高版本Windows的文件以进行引导
系统部署
- 使用
diskpart对vhd进行创建并命名为ARM8。接下来将会对EFIESP分区以及主系统分区分别分配盘符为F与P。
说明:maximum=后可以自定义磁盘大小(对于usb设备),如果采用sd设备启动则必须分配磁盘大小为16GB的整数倍
create vdisk file="C:\ARM8\HDD.vhd" maximum=65536 type=expandable
select vdisk file="C:\ARM8\HDD.vhd"
attach vdisk
convert gpt
create partition efi size=100
format quick fs=fat32
assign letter=F
create partition primary
format quick fs=ntfs
assign letter=P
exit
- 手动安装系统并为系统修复引导到
F::
DISM /Apply-Image /ImageFile:"X:\path\to\install.wim" /ApplyDir:P:\ /Index:1
bcdboot "P:\Windows" /s F: /f UEFI
- 修复引导完毕后将压缩包内的文件全部替换到
F:\下
- 弹出虚拟磁盘并创建bat脚本到qemu安装目录内,将以下内容复制到bat内,并对
YYYY-MM-DD进行修改以避免Windows的时间炸弹被触发。
假定我们的qemu主程序位于D:\QEMU v10.0.50-b8218f7 (clang64 dynamic build)\qemu-system-arm.exe,edk2存放于D:\EFISHELL\QEMU_EFI_ArmVirtQemu_ARM_RELEASE.fd
,虚拟磁盘位于C:\ARM8\HDD.vhd
1.SD卡启动配置:
@echo off
cd /d %~dp0
"D:\QEMU v10.0.50-b8218f7 (clang64 dynamic build)\qemu-system-arm.exe" ^
-M virt,force_el3=true,force_psci=on,pci=false,highmem=false ^
-cpu cortex-a15 ^
-smp cores=2,threads=4 ^
--accel tcg,thread=multi ^
-m 2048 ^
-bios "D:\EFISHELL\QEMU_EFI_ArmVirtQemu_ARM_RELEASE.fd" ^
-device VGA ^
-device usb-kbd,id=kbd ^
-device usb-tablet,id=mice ^
-drive id=sys,if=none,file="C:\ARM8\HDD.vhd" ^
-device sd-card,drive=sys ^
-device qemu-xhci ^
-rtc base=YYYY-MM-DD,clock=vm ^
-serial tcp::9090,server,nowait
2.USB启动配置:
@echo off
cd /d %~dp0
"D:\QEMU v10.0.50-b8218f7 (clang64 dynamic build)\qemu-system-arm" ^
-M virt,force_el3=true,force_psci=on,pci=false,highmem=false ^
-cpu cortex-a15 ^
-smp cores=2,threads=4 ^
--accel tcg,thread=multi ^
-m 2048 ^
-bios "D:\EFISHELL\QEMU_EFI_ArmVirtQemu_ARM_RELEASE.fd" ^
-device VGA ^
-device usb-kbd,id=kbd ^
-device usb-tablet,id=mice ^
-drive id=USB0,if=none,file="C:\ARM8\HDD.vhd" ^
-device usb-storage,drive=USB0 ^
-device qemu-xhci ^
-rtc base=YYYY-MM-DD,clock=vm ^
-serial tcp::9090,server,nowait
接下来可运行bat以继续安装Windows
sysprep以及OOBE跳过(可选)
出于某些系统会出现无法继续第二阶段安装,我们可以直接通过修改注册表进行部署: 挂载配置单元SYSTEM与SAM到本地计算机
假设分别挂载为 计算机\HKEY_LOCAL_MACHINE\RT-SYS 计算机\HKEY_LOCAL_MACHINE\RT-SAM
分别创建注册表项以进行下一步操作:
Windows Registry Editor Version 5.00

[HKEY_LOCAL_MACHINE\RT-SYS\Setup]
"SystemSetupInProgress"=dword:00000000
"SetupPhase"=dword:00000000
"CmdLine"=""
"SetupType"=dword:00000000
"OOBEInProgress"=dword:00000000
Windows Registry Editor Version 5.00

[HKEY_LOCAL_MACHINE\RT-SAM\SAM\Domains\Account\Users\000001F4]
"F"=hex:02,00,01,00,00,00,00,00,38,7f,6a,e2,35,6a,cd,01,00,00,00,00,00,00,00,\
00,58,3c,23,69,37,6a,cd,01,00,00,00,00,00,00,00,00,00,00,00,00,00,00,00,00,\
f4,01,00,00,01,02,00,00,10,02,00,00,00,00,00,00,00,00,01,00,01,00,00,00,00,\
  00,00,00,00,00,00,00
分别导入后卸载配置单元,随后再卸载vhd,并启动bat
由于QEMU模拟的性能问题系统运行效率较低,需要耐心进行等待
此教程适用于Windows RT Build 8318以及以上的版本
图库
-

启动屏幕
-

开始菜单
-

注册表
-

系统属性
-

锁屏界面
-
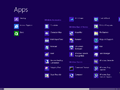
应用列表
-

任务管理器
-

Winver


